Getting started with the editor
The Voxdub editor is your workstation: you watch the video, write and time your lines on the rythmo band, record your voice or generate an AI voice, and export. This page gives you the overview you need to get started.
The regions of the editor
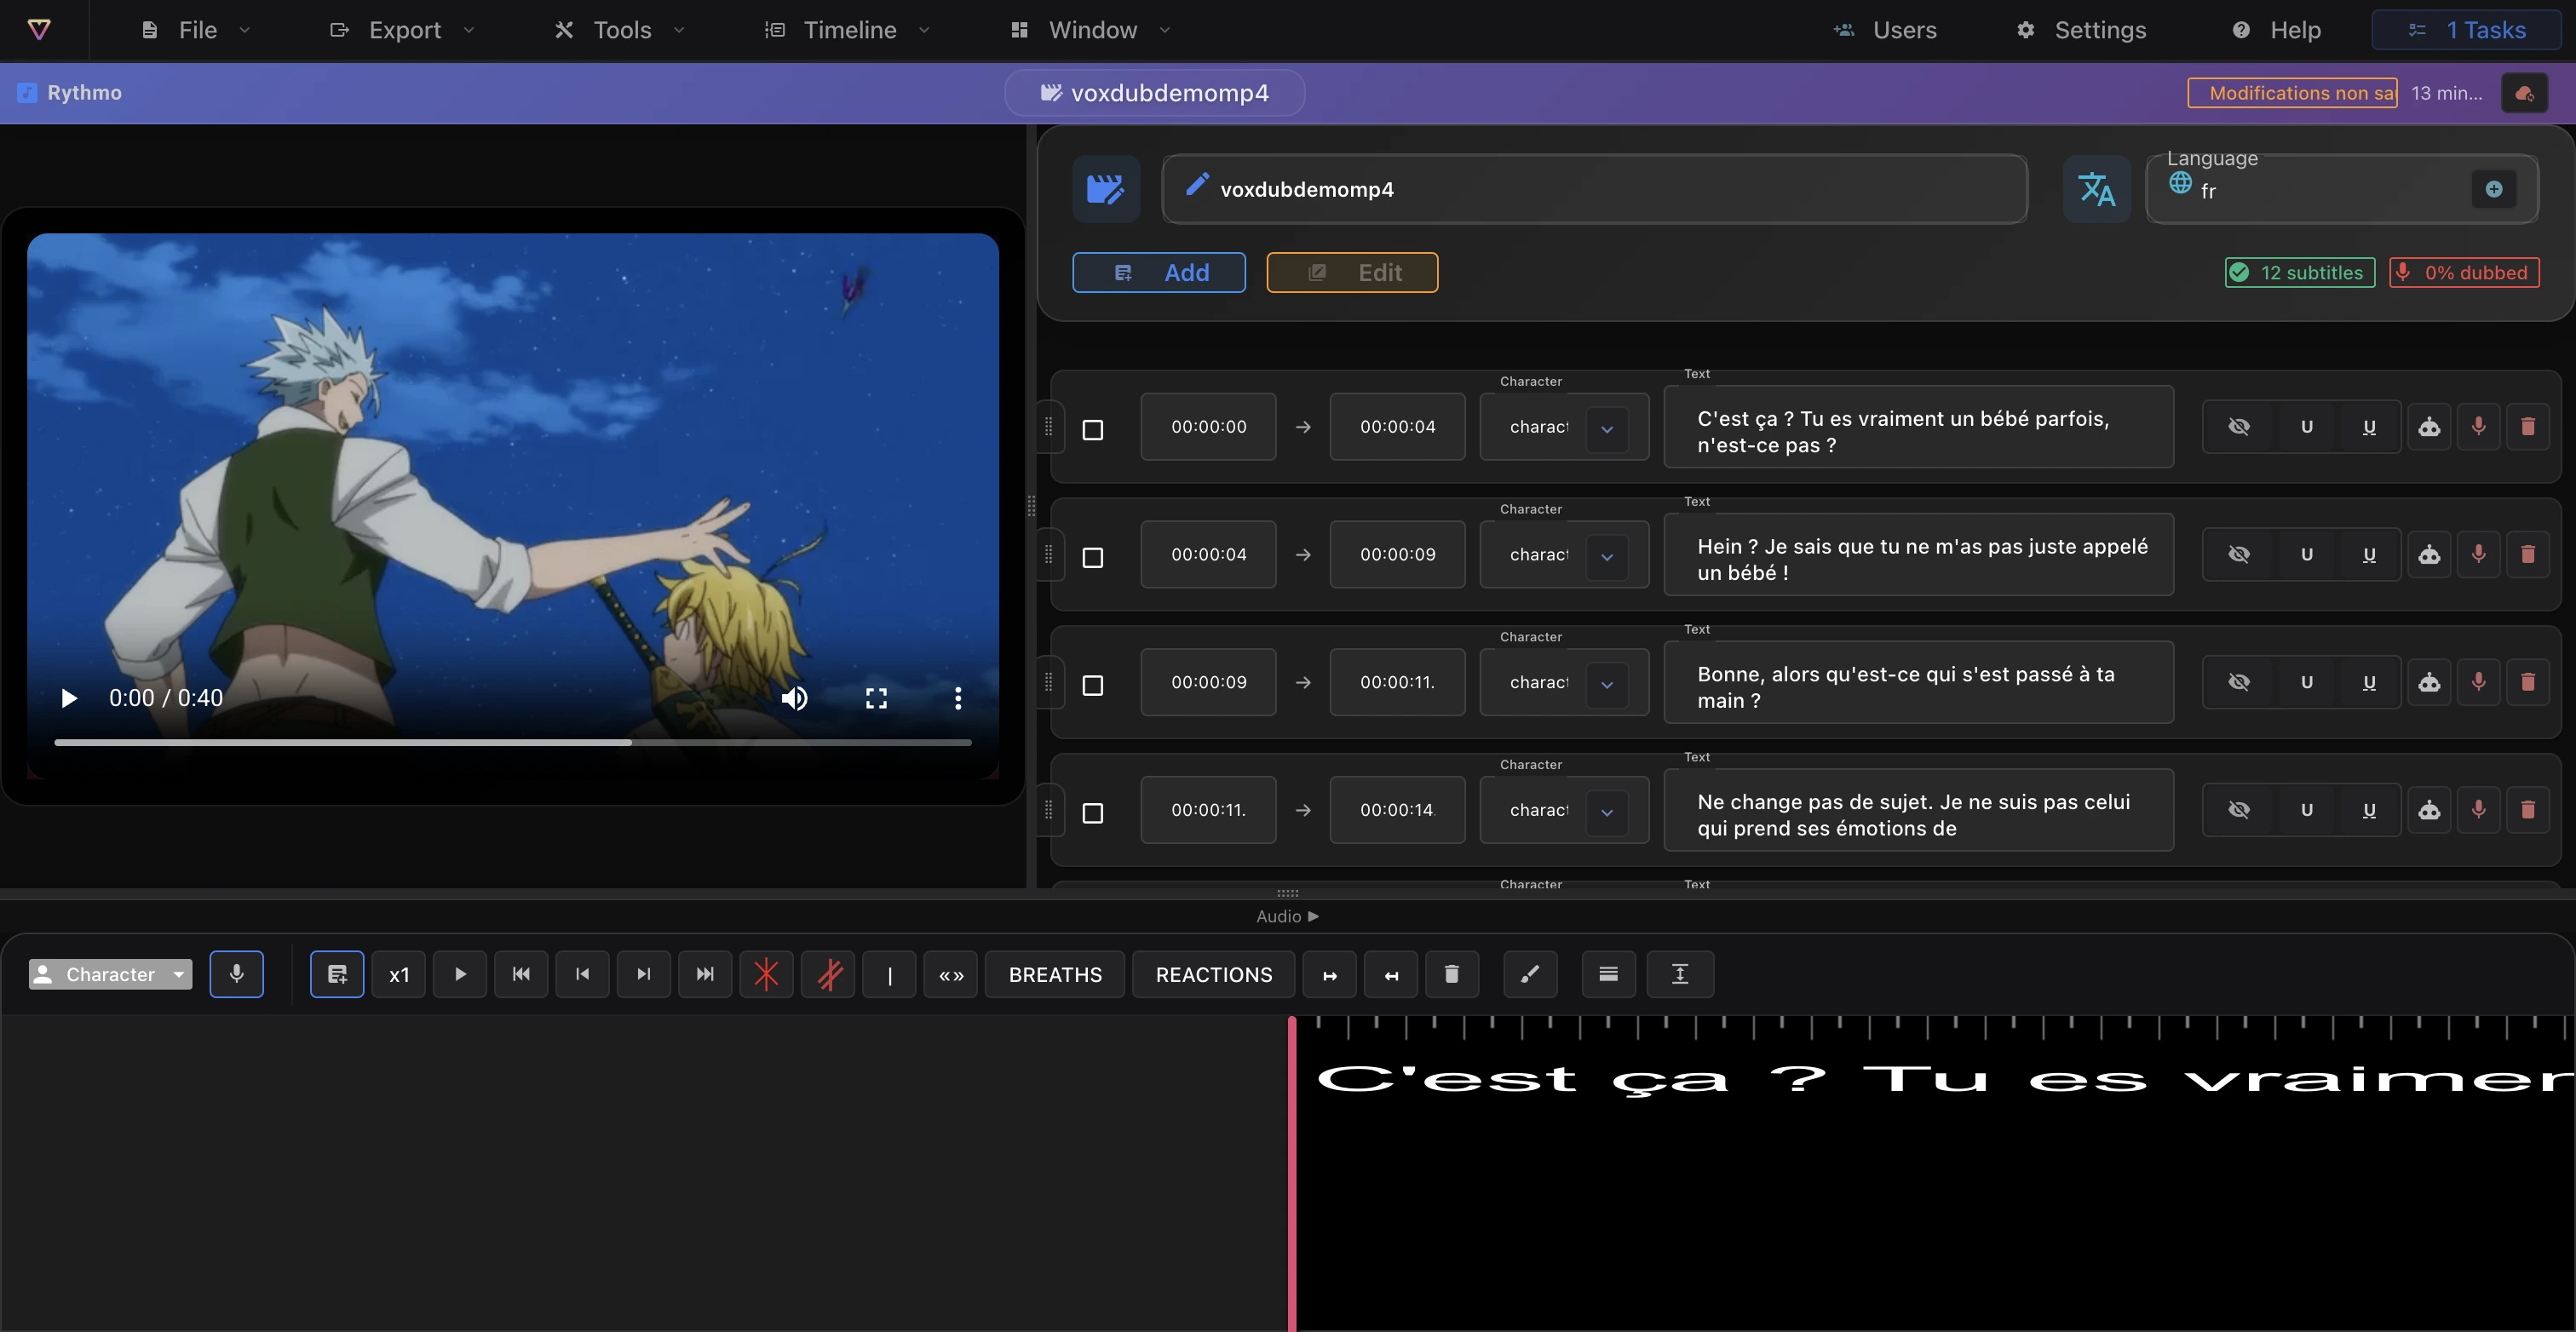
The screen splits into three main areas:
- The video preview: the video with its playback controls, plus an optional subtitle overlay on the image.
- The rythmo band: the synced scrolling strip beneath the video, with its toolbar just above it. This is where you place and time each line.
- The script panel: the list of dialogue lines. For each line you edit the text, assign a character, set the voice type and record or generate audio.
The menus
Along the top of the editor, menus group the main actions:
- File: import a project, load subtitles, import DETX, save the project.
- Export: video (1080p), subtitles (JSON / SRT / ASS), DETX, croisillé, BWF audio.
- Tools: scene detection, automatic subtitles, enhance your voice, replace the video (no voices), translate subtitles, generate an AI voice.
- Timeline: play, forward, backward, playback speed.
- Display: Studio mode, subtitles on the video.
- Plus Users (collaboration), Settings, Help and Tasks.
The rythmo band toolbar
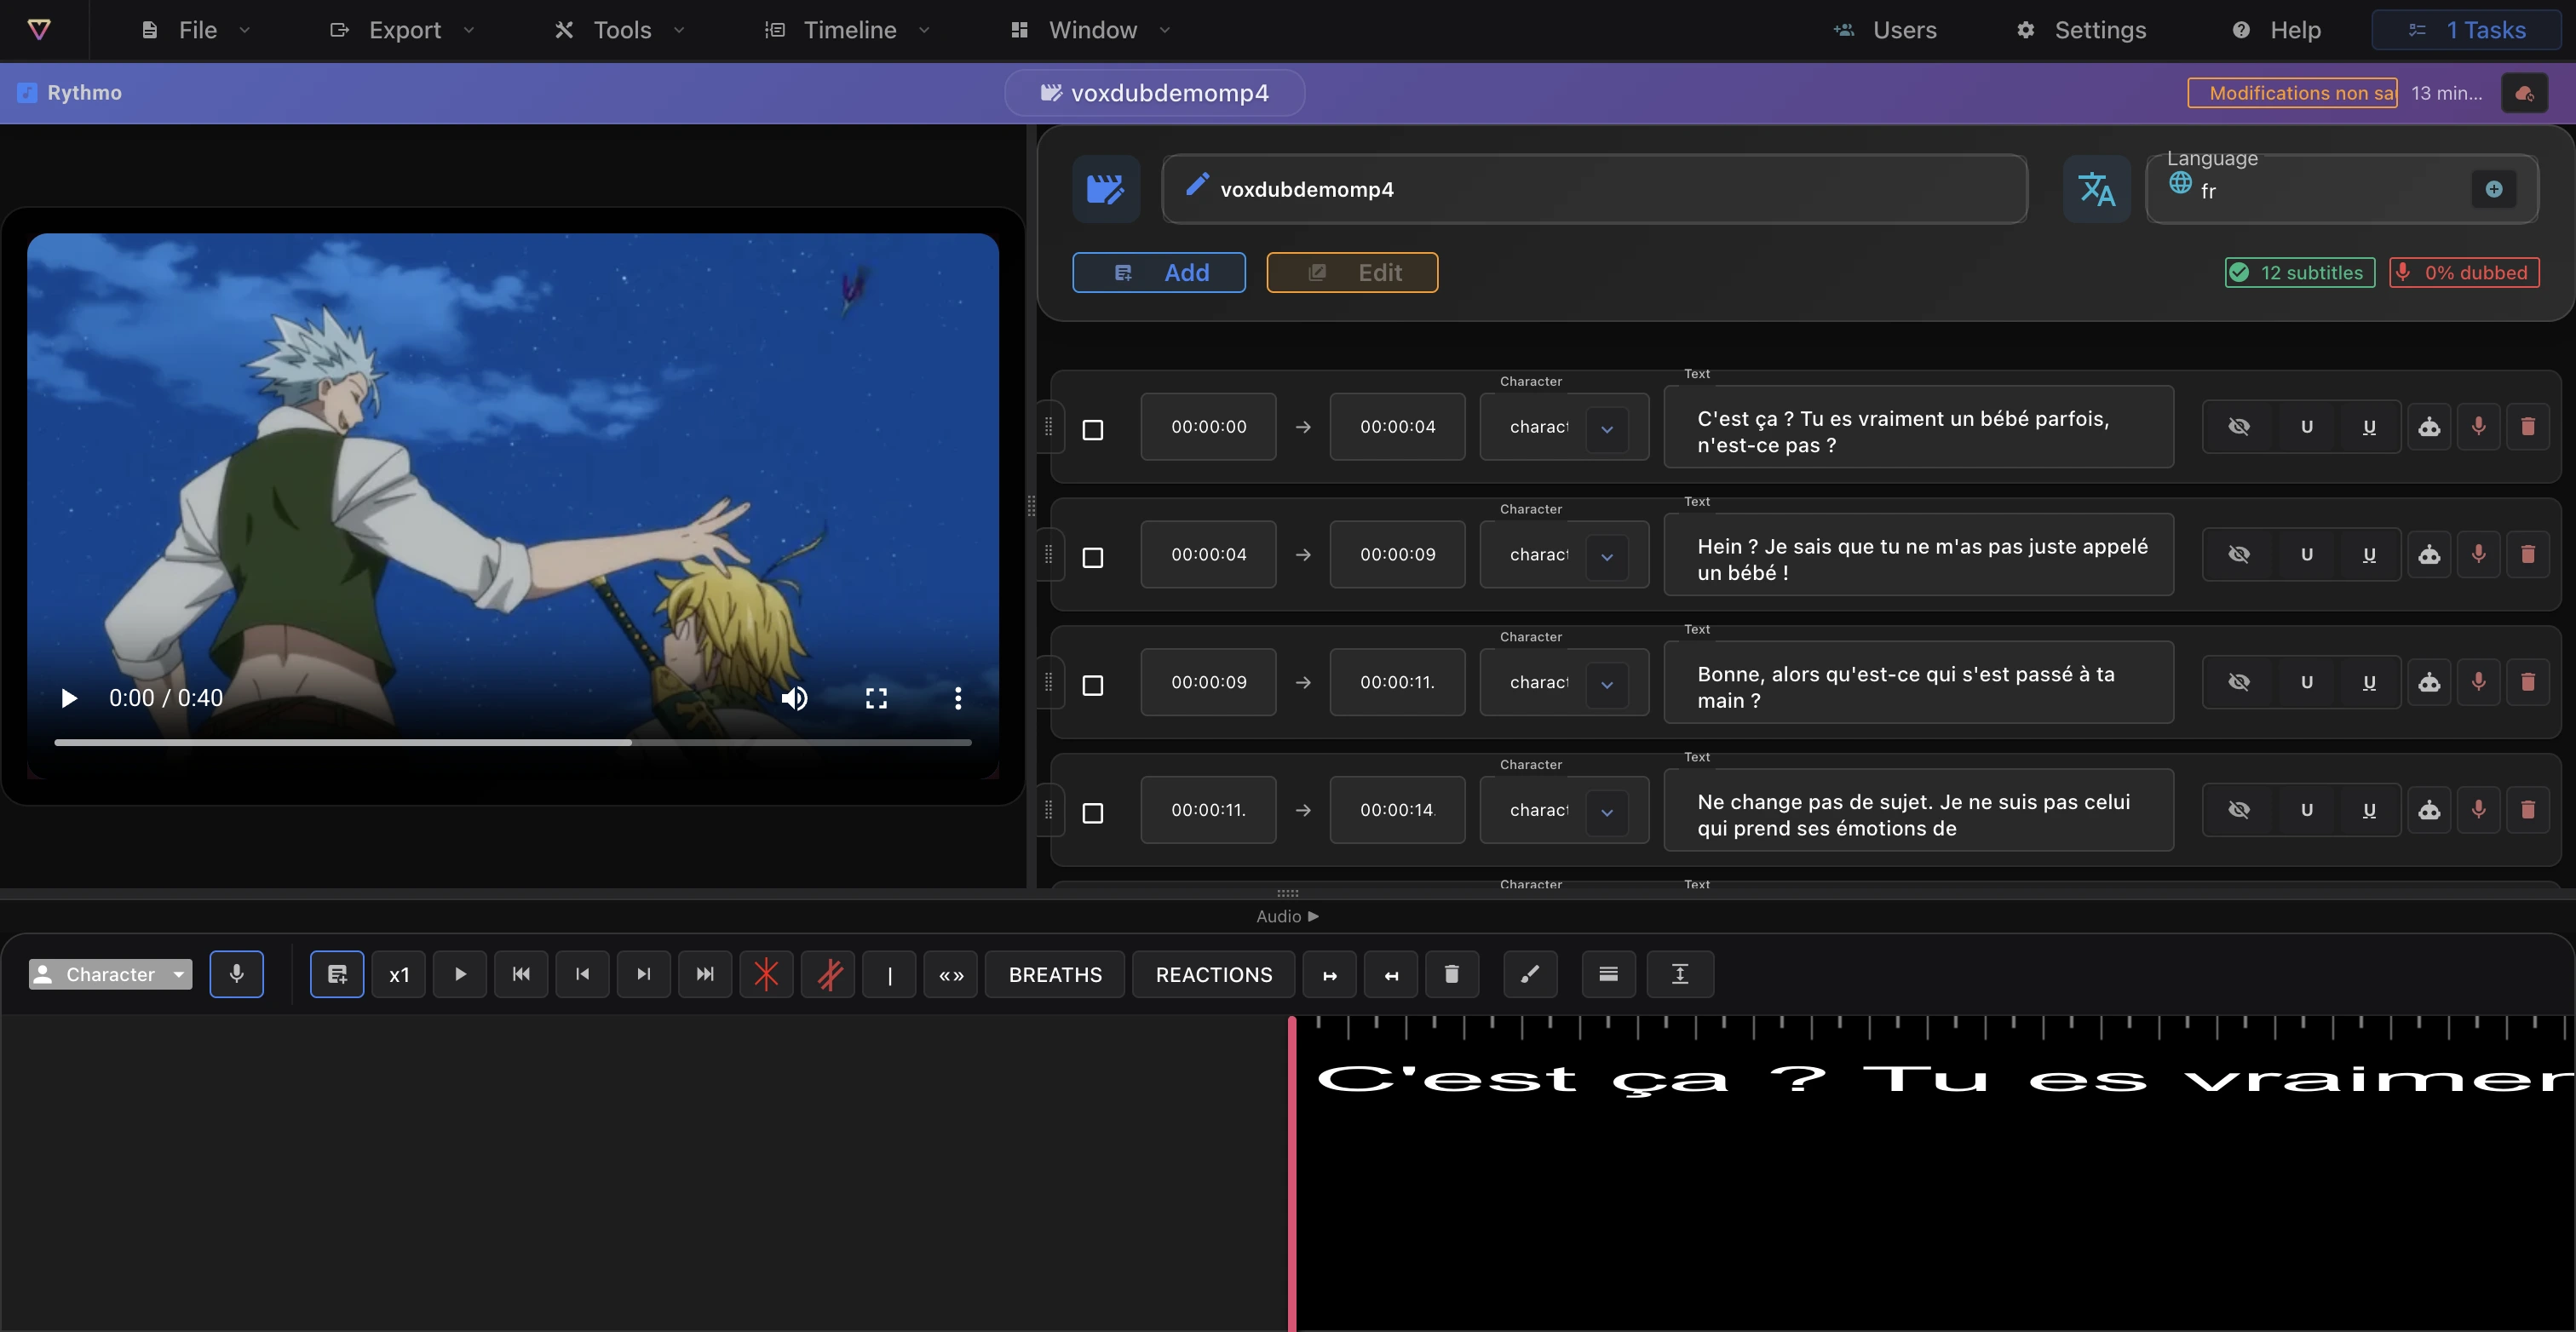
This is your main work surface. A few key tools to get you going:
- Add: add a dialogue line (on a chosen row).
- Play / navigation: play/pause, go to start/end, step frame by frame.
- End of dialogue / Scene / Note: drop markers at the playhead.
- Loop: place recording loops.
- Delete: switch to delete mode to remove elements from the band.
- Draw / 2 bands / band height: annotate, compare two languages, resize the band.
For the full reference, see The rythmo band tools.
The script panel
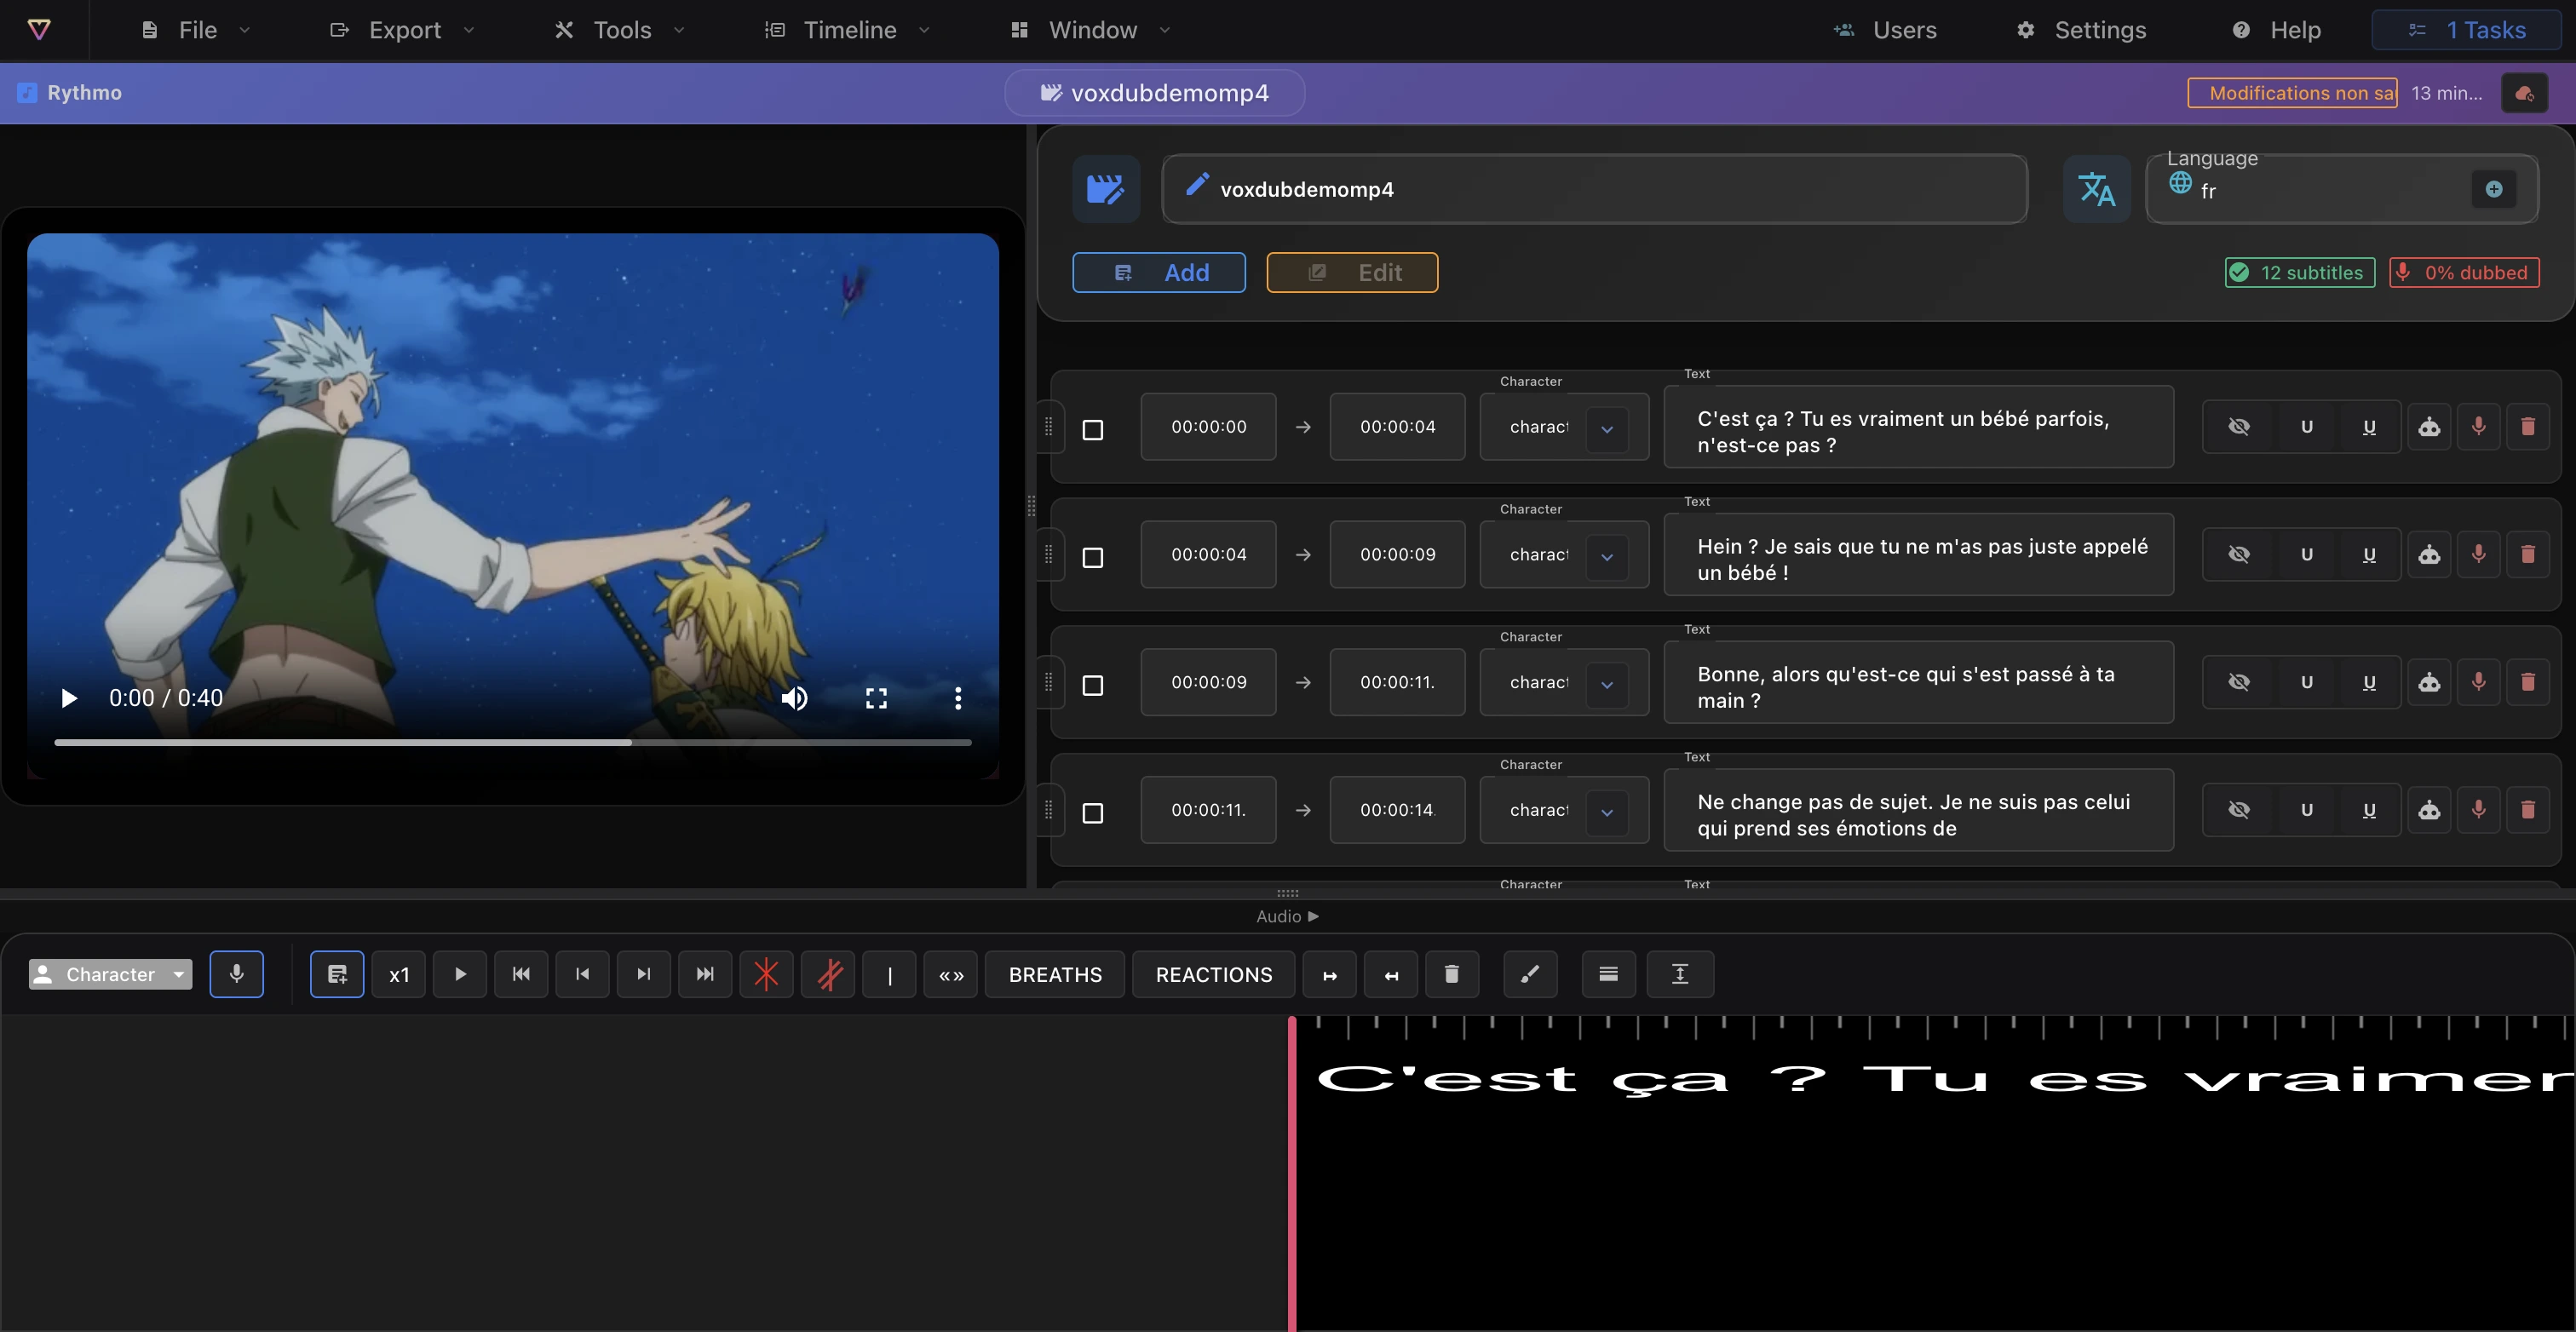
Each row in the script panel matches one dialogue line:
- Text: edit the dialogue directly.
- Character: assign a character to the line (see Characters).
- Voice / AI: choose the voice type (masculine / feminine) and generate an AI voice, or record your own.
Essential shortcuts
- Space: play / pause.
- → / ←: next / previous frame.
- Shift + → / ←: forward / back one second.
- ⌘ + wheel: nudge the playhead (not a zoom).
- ⌘ =: add a line. ⌘ K: start/stop recording. ⌘ S: save. ⌘ Z: undo (one-way).
On Windows and Linux, ⌘ is Ctrl. The full list is under Settings › Shortcuts — see Keyboard shortcuts.
Studio mode
Studio mode (in the Display menu, a Pro feature) hides the script panel and enlarges the video, so you can focus on recording or reviewing a pass. Select it again to return to the full editing view.
Saving your work
- Autosave saves periodically when it's enabled (see Autosave and undo).
- ⌘ S forces an immediate save to the server.
- There is no version history: to keep a reloadable copy, export your subtitles or DETX.
Go further
- Your first dub — a full dub from start to finish.
- The rythmo band tools — every tool on the band.
- Record your voice — record line by line.
- Editor display settings — fonts, colors and band appearance.
Ready to dub your video?
Create an account and start your first project in minutes, right in your browser. 7-day free trial.
Try Voxdub for free